Canning Peaches: A Beginner’s Guide to Water Bath Canning
 Welcome to our homestead journey! We’ve recently decided to take the plunge into a more self-sufficient lifestyle. As we’ve learned, preserving our own food is a rewarding way to enjoy the fruits (and in this case, peaches!) of our labor throughout the year.
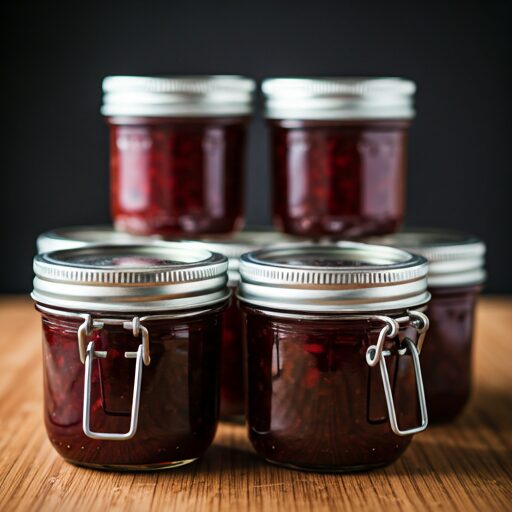
Today, we’re sharing our experience with canning peaches using the water bath method. This technique is surprisingly simple and yields delicious, shelf-stable peaches perfect for pies, cobblers, jams, or simply enjoying straight from the jar.
Why Water Bath Canning?
Water bath canning is a great method for preserving fruits and some acidic vegetables. Here’s why we chose this technique:
- Simple and Safe: Unlike pressure canning, water bath canning doesn’t require specialized equipment or high pressure. The boiling water bath ensures proper sterilization.
- Versatile: You can use water bath canning for a wide range of fruits, jams, jellies, and acidic vegetables.
- Beginner-Friendly: It’s a great way to start your canning journey without overwhelming yourself with complex techniques.
Gather Your Supplies
Before you get started, make sure you have the following supplies:
- Peaches: Choose ripe, firm peaches without bruises or blemishes. You’ll need about 4 pounds of peaches for a standard canning recipe.
- Water Bath Canner: This is a large pot designed specifically for water bath canning. You can find them at most kitchen stores or online.
- Jar Lifter: This tool helps you safely lift hot jars from the canner without burning yourself.
- Jar Funnel: A funnel makes it easier to fill jars without spills or messes.
- Wide-Mouth Canning Jars (pint or quart size): Make sure the jars are clean and free of chips or cracks.
- New Lids and Rings: You’ll need new lids for each jar. Reusable rings are fine, but the lids must be new for each batch.
- Canning Utensils: You’ll also need a ladle, a measuring cup, a rubber spatula, and a kitchen towel.
- Sugar: You’ll need sugar for the peach syrup.
- Lemon Juice: Adding a little lemon juice helps preserve the peaches’ color and prevents browning.
- Boiling Water Bath Canner Instructions: Consult your canner’s manual for specific instructions and processing times.
Step-by-Step Guide to Canning Peaches
Here’s a detailed guide on how to can peaches in a water bath canner:
1. Prepare the Peaches
- Wash and Peel: Wash the peaches thoroughly under cold water. Peel them using a sharp knife or a vegetable peeler. Remove any bruises or blemishes.
- Slice or Pit: Depending on your preference, slice the peaches into halves, quarters, or slices. If you prefer whole peaches, remove the pit by slicing around it and gently twisting it out.
- Blanch (Optional): Blanching peaches before packing them in jars helps them maintain their shape and color. To blanch, bring a large pot of water to a boil. Add the peaches for 1-2 minutes, then immediately plunge them into an ice bath to stop the cooking process. Drain and pat dry.
2. Prepare the Syrup
The syrup helps preserve the peaches and adds sweetness. You can adjust the sweetness to your liking.
- Combine Ingredients: In a saucepan, combine 4 cups of water, 2 cups of sugar, and 1 tablespoon of lemon juice. Bring to a boil over medium heat, stirring until the sugar is dissolved.
- Cool: Remove the syrup from the heat and let it cool slightly.
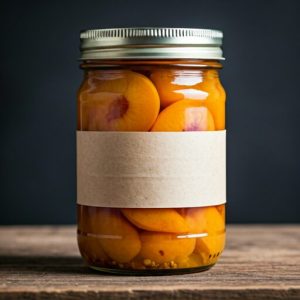
3. Pack the Jars
Pack the peaches into the prepared jars leaving 1-inch headspace at the top.
- Sterilize Jars: Before filling, sterilize your jars and lids. You can do this by washing them in hot, soapy water, then placing them in a boiling water bath for 10 minutes.
- Fill Jars: Carefully ladle the hot syrup over the peaches, leaving 1 inch of headspace. Use a rubber spatula to remove any air bubbles from the jars.
- Wipe Rims: Wipe the rims of the jars with a clean, damp cloth to ensure there is no syrup or residue left behind.
4. Process in the Canner
Now it’s time to process the jars in the boiling water bath.
- Fill Canner: Fill the canner with enough water to cover the jars by at least 1-2 inches. Bring the water to a rolling boil.
- Lower Jars: Carefully lower the jars into the boiling water using a jar lifter. Make sure the jars are completely submerged in the water.
- Process: Process the jars according to the recommended time for your recipe. For peaches in a water bath canner, the processing time is typically 20 minutes for pint jars and 25 minutes for quart jars.
- Remove Jars: Once the processing time is complete, carefully remove the jars from the canner using a jar lifter. Place them on a clean kitchen towel to cool.
5. Cool and Seal
- Cool: Let the jars cool completely at room temperature. The lids should seal as they cool. You’ll hear a popping sound as the lids seal.
- Test for Seals: Once the jars are cool, test the seals by pressing down on the center of the lid. If it doesn’t flex, it’s sealed.
- Label and Store: Label the jars with the date and contents. Store in a cool, dark place.
Tips for Success
- Use Fresh, Ripe Peaches: The quality of the peaches will affect the final product. Choose ripe peaches that are firm but not overly soft.
- Adjust Sweetness: You can adjust the amount of sugar in the syrup to your liking. For a less sweet syrup, use less sugar.
- Don’t Overpack Jars: Leave enough headspace (1 inch) to allow for proper processing and prevent the jars from bursting.
- Keep Water Boiling: Make sure the water in the canner stays at a rolling boil throughout the processing time.
- Follow Processing Times: The processing times are crucial for ensuring safe preservation. Do not shorten the processing time.
- Cool Slowly: Allow the jars to cool slowly at room temperature. This will help the lids seal properly.
Troubleshooting
Here are some common canning problems and solutions:
- Jars Not Sealing: If the lids don’t seal, there could be a few reasons:
- Dirty Jar Rims: Make sure the jar rims are clean and free of residue.
- Old Lids: Always use new lids for each batch of canning.
- Incorrect Processing Time: Make sure you followed the correct processing time for your recipe.
- Insufficient Headspace: Leaving too little headspace can prevent the lid from sealing properly.
- Peaches Discolored: Peaches may discolor if they are not blanched or if they are exposed to air for too long.
- Peaches Too Soft: If the peaches are too soft, they may not hold their shape in the jars. Choose firmer peaches and blanch them for a shorter time.
Enjoy Your Canned Peaches!
With a little practice and these helpful tips, you’ll be enjoying the sweet taste of summer peaches all year long. It’s a rewarding experience to preserve your own food and share it with loved ones. Happy canning!
About Us
We’re excited to share their experiences, tips, and recipes as they learn the joys of growing, preserving, and living a more self-sufficient lifestyle.