Building a DIY Solar Panel System with Energy Storage for Your Homestead

As a young couple embarking on my homesteading journey, I knew I wanted to embrace sustainable living. One of the first things I set my sights on was creating my own renewable energy source. After much research and learning, I built a DIY solar panel system with energy storage. This project empowered me to become more self-sufficient and reduce my reliance on the grid. This article shares my journey and provides a comprehensive guide for anyone interested in taking this leap.
Why Build a DIY Solar Panel System?
Building a solar panel system allows for greater control over your energy source. You can choose the components that best suit your needs and budget. You can also tailor the system to the specific energy demands of your homestead. Beyond the practical benefits, there’s a sense of satisfaction and accomplishment in creating something that powers your life.
Assessing Your Needs
Before diving into the project, it’s crucial to assess your energy needs. This involves understanding:
- Daily Energy Consumption: Track your electricity usage for a week or two. You can use a kilowatt-hour (kWh) meter or refer to your energy bills. This data will help you determine how much energy your solar panel system needs to generate.
- Peak Demand: Identify the times of day when your energy consumption is highest. This will help you determine the size of your battery storage system.
- Homestead’s Location and Orientation: The amount of sunlight your homestead receives throughout the day influences the efficiency of your solar panel system.
Components of a Solar Panel System
A basic solar panel system with energy storage consists of the following components:
- Solar Panels: These convert sunlight into direct current (DC) electricity. Choose panels based on their wattage, efficiency, and warranty. You’ll need to calculate the number of panels required based on your energy needs.
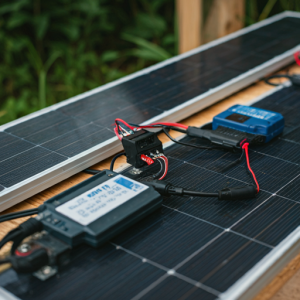
- Solar Charge Controller: This device regulates the flow of electricity from the solar panels to the battery bank. It prevents overcharging and protects the batteries.
- Battery Bank: These store energy generated by the solar panels for later use. You can choose from lead-acid, lithium-ion, or flow batteries, each with their advantages and disadvantages.
- Inverter: This device converts the DC electricity from the batteries to alternating current (AC) electricity, which powers your appliances and devices.
- Wiring and Connectors: You’ll need appropriate wiring to connect the various components and conduit to protect them from the elements.
Choosing the Right Components
Choosing the right components for your DIY solar panel system is crucial for its efficiency and longevity.
Solar Panels
- Wattage: Solar panels are rated in watts. The higher the wattage, the more energy they can generate. Choose panels with wattage appropriate for your energy needs.
- Efficiency: Efficiency measures how well a panel converts sunlight into electricity. Panels with higher efficiency require less space for installation.
- Type: There are different types of solar panels, including monocrystalline, polycrystalline, and thin-film. Each has its own advantages and disadvantages. Monocrystalline panels are generally the most efficient.
- Warranty: Look for panels with a long warranty period, typically 25 years for materials and workmanship.
Battery Bank
- Capacity: Batteries are rated in amp-hours (Ah) or kilowatt-hours (kWh). The higher the capacity, the more energy they can store. Choose a battery bank that can hold enough energy for your peak demand.
- Depth of Discharge (DoD): This refers to the percentage of battery capacity that can be discharged before it needs to be recharged. A higher DoD allows for more energy use.
- Cycle Life: This refers to the number of times a battery can be fully charged and discharged before it degrades significantly. Lead-acid batteries have lower cycle life compared to lithium-ion batteries.
- Type: Common battery types include lead-acid (flooded, AGM, gel), lithium-ion, and flow batteries. Choose a type that suits your needs, budget, and installation space.
Charge Controller
- Voltage: Choose a charge controller with a voltage rating that matches your solar panels and battery bank.
- Current Rating: The current rating of the charge controller should be sufficient to handle the current output of your solar panels.
- Features: Some charge controllers have advanced features like temperature compensation, over-voltage protection, and battery monitoring.
Inverter
- Power Rating: Choose an inverter with a power rating that meets your peak AC power demand.
- Efficiency: Inverter efficiency is measured as a percentage. Choose an inverter with high efficiency to minimize energy loss.
- Waveform: Inverters produce different waveforms, including modified sine wave, pure sine wave, and hybrid. Pure sine wave inverters provide the most stable output for sensitive appliances.
Installation and Maintenance
Once you have all the necessary components, you can start the installation process. However, it is crucial to follow safety precautions and consult with a qualified electrician if you are unfamiliar with electrical work.
Installation Steps
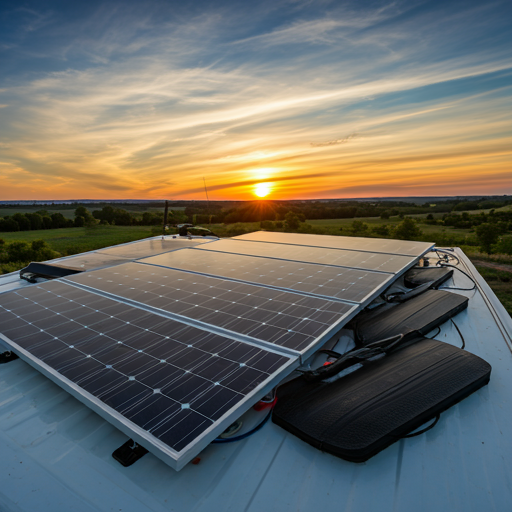
- Mount the Solar Panels: Securely mount the solar panels on a roof or other suitable location with the correct angle and orientation for maximum sunlight exposure.
- Connect the Panels to the Charge Controller: Wire the solar panels to the charge controller using the appropriate wiring and connectors.
- Connect the Battery Bank: Connect the battery bank to the charge controller and ensure the polarity is correct.
- Connect the Inverter: Wire the battery bank to the inverter. The inverter converts DC electricity from the batteries to AC electricity for your appliances.
- Connect to the Electrical System: Connect the inverter to your existing electrical system, following all safety guidelines and local building codes.
Maintenance Tips
Regular maintenance is essential for the optimal performance and longevity of your solar panel system.
- Clean Solar Panels: Dust, dirt, and debris can reduce the efficiency of your solar panels. Clean them regularly with a soft brush and water.
- Monitor Battery Health: Use a battery monitor to check the charge level, voltage, and specific gravity of your batteries.
- Inspect Wiring and Connectors: Regularly inspect wiring and connectors for any signs of wear or damage.
- Check Charge Controller and Inverter: Make sure the charge controller and inverter are operating correctly and check for any error codes.
Troubleshooting and Safety
Like any electrical system, your solar panel system can experience occasional problems. Here are some common issues and troubleshooting tips:
- Low Power Output: Check for debris on the solar panels, damaged wiring, or a malfunctioning charge controller.
- Overheating: Overheating can occur due to inadequate ventilation or shading. Ensure proper airflow and avoid placing objects near the panels.
- Battery Issues: Inspect battery terminals, check the charge level, and ensure proper electrolyte levels if using lead-acid batteries.
- Inverter Problems: Check for any error codes on the inverter and consult the manufacturer’s instructions.
Safety Precautions
Always prioritize safety when working with electricity. Here are some important precautions:
- Disconnect Power: Turn off the main breaker before working on any electrical components.
- Use Insulated Tools: Use tools with insulated handles to prevent electrical shock.
- Wear Proper Protective Gear: Wear safety glasses, gloves, and non-conductive footwear.
- Consult Professionals: If you are unsure about any aspect of the installation or maintenance, consult a qualified electrician.
Conclusion
Building a DIY solar panel system with energy storage is a rewarding experience. It allows you to take control of your energy source, reduce your reliance on the grid, and live a more sustainable lifestyle. By following the steps outlined in this article and prioritizing safety, you can harness the power of the sun to power your homestead and enjoy the many benefits of renewable energy. Remember, this is a learning journey, and there will be times when you’ll need to troubleshoot and adapt. Don’t hesitate to consult with experts and online resources for guidance.


