From City Slickers to Homesteaders: Our Canning Journey
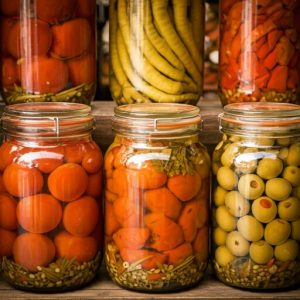
 We recently traded in the hustle and bustle of city life for the peace and tranquility of a small homestead. It’s been a whirlwind of learning, and one of the most rewarding aspects has been embracing the art of canning. We’re no experts, but we’ve learned a lot in a short time and are excited to share our journey with you!
Why We Started Canning
Canning wasn’t on our radar when we first moved to the countryside. But as we started our garden, the abundance of fresh produce quickly became overwhelming. We knew we needed a way to preserve our harvest, and canning seemed like a natural fit. Not only would it allow us to enjoy our garden’s bounty all year long, but it also offered a sense of self-sufficiency that we found incredibly satisfying.
Our First Canning Experience
Our initial foray into the world of canning was a bit daunting. We purchased a basic canning kit and a plethora of cookbooks, armed with the determination to master the art of preserving. It was a steep learning curve, filled with moments of frustration and triumphs. Our first successful batch of canned peaches was met with ecstatic cheers and a sense of accomplishment that went beyond simply having a pantry full of preserved fruit.
Canning Essentials: A Beginner’s Guide
If you’re thinking about trying your hand at canning, we recommend starting with these essential tools and techniques:
Equipment
- Canning Jars: Opt for wide-mouth jars for easier filling and cleaning. Choose the size that best suits your needs. We use both pint and quart jars for variety.
- Canning Kettle: This essential piece of equipment provides a safe and consistent environment for processing your jars. It should be large enough to accommodate your jars with room to spare for water circulation.
- Jar Lifter: A jar lifter is essential for safely transferring hot jars in and out of the canning kettle.
- Jar Funnel: This helps you fill jars without making a mess. Look for a funnel with a wide opening and a spout that fits snugly into the jar.
- Magnetic Lid Lifter: This tool makes it easy to safely pick up and handle hot lids.
- Ladle: Use a ladle to transfer liquids and syrups into jars.
- Rubber Spatula: This is helpful for removing air bubbles from jars.
- Measuring Cups and Spoons: You’ll need accurate measuring tools for your recipes.
- Kitchen Towels: Have several kitchen towels on hand for wiping spills and drying jars.
- Dish Soap and Cleaning Brushes: Proper sanitation is critical for safe canning. Make sure you thoroughly wash all equipment before and after each use.
Canning Techniques
Canning involves two primary methods: water bath canning and pressure canning.
Water Bath Canning
Water bath canning is a suitable method for preserving high-acid foods such as fruits, jams, jellies, and pickled vegetables. Here’s the basic process:
- Prepare the jars: Wash the jars and lids thoroughly with dish soap and hot water. Sterilize the jars by boiling them in water for 10 minutes.
- Prepare the food: Follow your chosen recipe for preparing your fruit or vegetables. Make sure you use the correct proportions of sugar, water, or vinegar.
- Fill the jars: Fill the jars with your prepared food, leaving the recommended headspace (space between the food and the rim). Remove any air bubbles with a rubber spatula.
- Wipe the rims: Ensure the rims are clean and free from food residue.
- Add lids and rings: Place the lids on the jars and screw the rings on tightly, but don’t over-tighten.
- Process in the canning kettle: Fill the canning kettle with enough water to cover the jars by at least an inch. Bring the water to a rolling boil. Place the jars in the kettle, ensuring they are covered with water. Process for the time specified in your recipe.
- Remove and cool: Carefully remove the jars from the canning kettle using a jar lifter. Allow the jars to cool completely on a wire rack or a clean, dry surface.
Pressure Canning
Pressure canning is necessary for preserving low-acid foods such as meats, poultry, and vegetables that require a higher temperature to destroy harmful bacteria. This method involves using a pressure canner, which creates steam pressure to achieve the desired temperature. The process is similar to water bath canning, but the pressure canner is used instead of a regular kettle. Always follow the instructions provided with your pressure canner carefully.
Canning Tips
Here are some practical tips we’ve learned along the way:
- Follow your recipe carefully: Each recipe has specific instructions regarding processing times, headspace, and ingredients. Don’t deviate from the recipe.
- Use fresh ingredients: Start with the freshest produce possible for the best flavor and quality.
- Sanitize everything: Always sanitize your jars, lids, and equipment to prevent contamination. Any un-sanitized surfaces can introduce bacteria that could spoil your food.
- Proper headspace: Leave the correct amount of headspace in the jars to allow for expansion during processing. Incorrect headspace can lead to improper sealing or exploding jars.
- Check for seals: After processing, make sure the lids have sealed properly. A sealed lid will typically have a slight indentation in the center.
- Store in a cool, dark place: Once the jars are sealed, store them in a cool, dark, and dry location. Avoid direct sunlight, as this can affect the color and quality of your preserved foods.
- Use your canned goods: The joy of canning is enjoying your preserved food later! Don’t let your canned goods sit for too long. Use them within a year for the best flavor and quality.
Our Favorite Canning Recipes
We’ve experimented with various canning recipes, and here are a few of our favorites:
Peach Jam
This recipe is incredibly simple and yields a delicious jam that’s perfect for spreading on toast or using in baking. Here’s what you’ll need:
- 4 cups chopped ripe peaches
- 4 cups sugar
- 1/4 cup lemon juice
Instructions:
- Combine peaches, sugar, and lemon juice in a large pot. Bring to a boil over medium heat, stirring frequently.
- Reduce heat to low and simmer for 15-20 minutes, stirring occasionally, until the jam thickens.
- Prepare the jars by sterilizing them and keeping them hot.
- Ladle the hot jam into the hot jars, leaving 1/4 inch headspace.
- Wipe the rims, place the lids and rings, and process in a boiling water bath for 10 minutes.
- Remove the jars from the canner and let them cool completely.
Spicy Pickles
For those who enjoy a little heat, these spicy pickles are a fantastic way to preserve cucumbers. Here’s what you’ll need:
- 1 pound small cucumbers
- 1 cup vinegar
- 1/2 cup water
- 1/2 cup sugar
- 1 tablespoon salt
- 1 teaspoon mustard seeds
- 1 teaspoon black peppercorns
- 1/2 teaspoon red pepper flakes
Instructions:
- Wash and trim the cucumbers, leaving them whole or sliced as desired.
- In a large pot, combine vinegar, water, sugar, salt, mustard seeds, peppercorns, and red pepper flakes.
- Bring the mixture to a boil over medium heat, stirring until the sugar dissolves.
- Pack the cucumbers into sterilized jars, leaving 1/2 inch headspace.
- Pour the hot brine over the cucumbers, leaving 1/4 inch headspace.
- Wipe the rims, place the lids and rings, and process in a boiling water bath for 10 minutes.
- Remove the jars from the canner and let them cool completely.
The Joy of Homegrown & Preserved
Canning is a rewarding skill that has brought us immense joy. It’s not just about preserving food; it’s about connecting with our garden, learning traditional techniques, and creating a pantry full of delicious homemade goodies. It’s a journey of discovery, and we encourage you to embark on your own canning adventure. You might just find it’s the perfect way to savor the fruits (and vegetables) of your labor.


