Building a Raised Garden Bed with Pallets: A Beginner’s Homesteader’s Guide
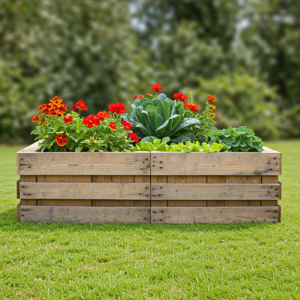 Welcome to my little corner of the internet, fellow homesteaders! I’m on a journey to create a more self-sufficient life, one garden bed at a time. Today, I’m sharing a project that’s perfect for beginners, a budget-friendly way to get your hands dirty and start growing your own food: building a raised garden bed with pallets.
Why Pallets?
I’m a big fan of finding creative uses for everyday materials, and pallets are a goldmine! They’re readily available, often free, and surprisingly sturdy. Plus, using recycled materials is a fantastic way to be more eco-conscious and reduce waste.
Materials You’ll Need:
- 2-4 Pallets: The number depends on the size you want. Look for pallets in good condition, with no broken boards.
- Heavy-duty gloves: Protect your hands while handling the pallets.
- Screwdriver or drill: For securing the pallets.
- Screws or nails: Long enough to go through the pallet boards.
- Landscape fabric or weed barrier: To prevent weeds from growing up through the bed.
- Soil: Choose a high-quality potting mix or garden soil. You’ll need several bags, depending on the size of your bed.
- Optional: Wood stain, paint, or sealant for a more finished look.
Choosing Your Pallets:
Not all pallets are created equal! Here’s what to look for:
- Heat-treated: Avoid pallets treated with methyl bromide (MB), which can be harmful. Look for the “HT” stamp for heat-treated pallets.
- Sturdy construction: Check for broken boards or loose nails.
- Proper size: Consider the space you have available and the size of the bed you want to create.
Step-by-Step Instructions:
1. Prepare the Pallets:
This is where the hard work happens! Wear your gloves and make sure you have a sturdy surface to work on. Here’s how to prepare your pallets for the garden bed:
- Remove any loose boards or nails: Safety first! You don’t want to step on any loose nails while building.
- Clean the pallets: Use a brush and soapy water to remove dirt and debris. If you’re using treated wood, give the pallets a thorough cleaning before using them for growing food.
- Sand the boards: (optional) This will smooth out any rough edges and give the pallets a nicer finish.
2. Assemble the Garden Bed:
This is where the fun begins! Here’s how to put your pallet garden bed together:
- Decide on your design: You can stack the pallets horizontally or vertically, depending on the size and height you want.
- Secure the pallets: Use screws or nails to fasten the pallets together. You can also use metal brackets for extra support.
- Add a bottom layer: If you’re using pallets with gaps between the boards, add a layer of landscape fabric or weed barrier to the bottom to prevent soil from falling out.
3. Fill with Soil:
This is the moment we’ve been waiting for – time to add the soil!
- Add a layer of compost: A layer of compost at the bottom will help to enrich the soil and provide nutrients for your plants.
- Fill the bed with soil: Use high-quality potting mix or garden soil, filling the bed to within a few inches of the top. You can also add amendments to the soil, such as fertilizer or compost.
- Water the soil: Thoroughly water the soil to settle it and help the seeds germinate.
4. Add Your Plants:
Now, the fun part! Choose your favorite vegetables, herbs, or flowers to plant in your new pallet garden bed.
- Space your plants: Make sure you leave enough space for your plants to grow.
- Water regularly: Keep the soil moist, but not soggy.
- Enjoy your garden!
Tips for Success:
- Choose the right plants: Consider the amount of sunlight your garden bed will receive and select plants that thrive in those conditions.
- Water wisely: Ensure the soil is well-draining to prevent root rot. Water deeply but infrequently to encourage deep root growth.
- Add compost: Regular additions of compost will keep your soil healthy and productive.
- Use a rain gauge: Monitor rainfall to ensure your plants receive adequate water, especially during dry spells.
- Get creative! You can personalize your pallet garden bed with a coat of paint, decorative stones, or even a trellis for climbing plants.
Troubleshooting:
Building a pallet garden bed is a great project, but sometimes you might encounter some challenges. Here are some common issues and solutions:
- Pallets are too small: Combine multiple pallets to create a larger bed.
- Pallets are uneven: Level the bed by adding extra soil to the lower areas.
- Soil is leaching out: Add another layer of landscape fabric or weed barrier to the bottom of the bed.
- Weeds are a problem: Choose a weed barrier that is sturdy and hard to penetrate. You can also use mulch around the plants to help suppress weeds.
Inspiration and Ideas:
There are endless possibilities when it comes to building pallet garden beds! Here are a few ideas to spark your creativity:
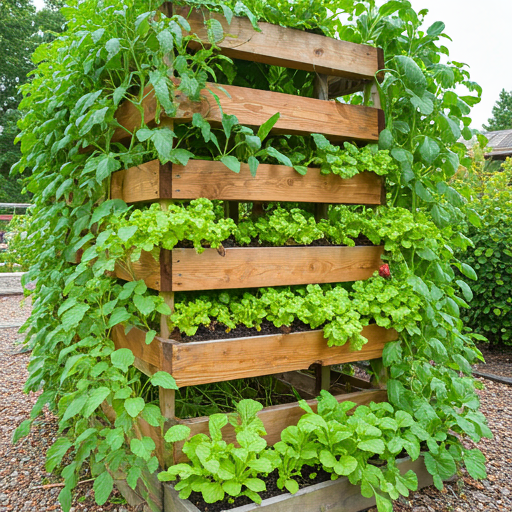
- Vertical garden: Create a vertical garden by stacking the pallets on top of each other.
- Herbs and flowers: Create a beautiful and aromatic herb and flower garden.
- Raised vegetable bed: Grow your favorite vegetables in a raised bed for easier access and better drainage.
- Tiered garden: Create a tiered garden by stacking pallets at different levels. This is great for growing plants with different height requirements.
Conclusion:
Building a raised garden bed with pallets is a fun, easy, and sustainable way to get your hands dirty and start growing your own food. With a little creativity and some basic materials, you can create a beautiful and functional garden space for years to come. Happy gardening!

