Growing Sunflowers from Seed Indoors: A Beginner’s Guide
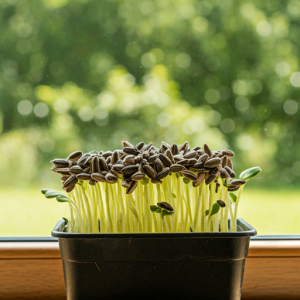
Hi there, fellow homesteaders! It’s me, your neighbor who’s just embarking on this exciting journey of growing our own food and flowers. This spring, I’m determined to have the most beautiful sunflowers in the neighborhood. So, let’s get our hands dirty (literally) and learn how to grow sunflowers from seed indoors, together!
Why Start Indoors?
Starting your sunflower seeds indoors gives them a head start, especially in cooler climates. This means they’ll bloom earlier and you’ll enjoy their sunny presence longer. Plus, it allows you to control the growing environment, ensuring healthy seedlings before they face the challenges of the great outdoors.
Step-by-Step Guide:
1. Choosing the Right Seeds:
The first step is picking the perfect seeds. You’ll find a wide variety, from dwarf varieties perfect for containers to towering giants. Consider the size of your garden, the color you desire, and the blooming period.
Here are some popular sunflower varieties for beginners:
- Russian Giant: A classic choice, known for its massive size and vibrant yellow blooms.
- Sunspot: Produces a mix of vibrant colors, from yellow and orange to red and bronze.
- Teddy Bear: A dwarf variety, perfect for containers or smaller gardens. Produces adorable fuzzy blooms.
Remember to purchase seeds from a reputable source to ensure high germination rates.
2. Preparing Your Seed Starting Mix:
Now, let’s get those seeds ready to grow! You’ll need a seed starting mix specifically designed for germination. Avoid using regular potting soil, as it can be too dense and impede root growth.
Here’s how to prepare your seed starting mix:
- Fill seed starting trays or individual pots with the mix, leaving about ½ inch from the top.
- Gently moisten the mix, ensuring it’s evenly damp but not soggy.
3. Sowing the Seeds:
Now, the fun part – planting those seeds! Here’s how to do it right:
- Make a shallow hole, about ½ inch deep, in the seed starting mix.
- Drop one seed into each hole.
- Cover the seed with more mix, gently patting it down.
- Water gently, ensuring the mix is moist but not waterlogged.
4. Providing Ideal Growing Conditions:
Now it’s time to give those seeds the love they need to thrive. Place your seed starting trays in a warm, sunny location. Sunflowers need at least 6 hours of sunlight per day, so aim for a south-facing window.
Here are some key factors to consider:
- Temperature: The ideal temperature for sunflower germination is around 70-75 degrees Fahrenheit. You can use a heat mat to maintain a consistent temperature.
- Light: Sunflower seeds need plenty of light to sprout and grow strong. If natural light isn’t sufficient, use grow lights to supplement.
- Moisture: Keep the seed starting mix moist but not soggy. Check the moisture level daily and water as needed.
5. Thinning the Seedlings:
Once the seedlings emerge, you’ll need to thin them out. This ensures each seedling has ample space to develop strong roots and stems. Here’s how to do it:
- When the seedlings have a couple of true leaves, carefully remove the weakest seedling from each cell or pot, leaving the strongest one to thrive.
- Use a pair of scissors to gently snip off the unwanted seedling at the soil level.
6. Hardening Off:
Before transplanting your sunflower seedlings outdoors, you need to gradually introduce them to the harsh realities of the open air. This process is called hardening off. Here’s how to do it:
- Start by placing your seedlings in a sheltered outdoor location for a few hours each day, gradually increasing the time spent outdoors.
- Choose a location that offers some shade from direct sunlight, especially in the hottest hours of the day.
- Protect your seedlings from strong winds and harsh weather conditions.
- Continue hardening off for a week or two before transplanting them to their permanent location.
7. Transplanting Outdoors:
Congratulations, your sunflower seedlings are ready to conquer the great outdoors! Now’s the time to transplant them to their permanent location.
Here are some tips for successful transplanting:
- Choose the right spot: Sunflowers thrive in full sun, so choose a location that receives at least 6 hours of direct sunlight daily.
- Prepare the soil: Amend the soil with compost or manure to improve drainage and fertility.
- Dig a hole: Dig a hole twice as wide and as deep as the root ball of your seedling.
- Gently remove the seedling: Carefully remove the seedling from its container, avoiding damaging the roots.
- Place in the hole: Position the seedling in the hole, ensuring the top of the root ball is level with the surrounding soil.
- Fill the hole with soil: Backfill the hole with soil, gently pressing it down around the roots.
- Water thoroughly: Water the newly transplanted sunflower deeply to settle the soil around the roots.
Care and Maintenance:
Once your sunflowers are in the ground, they’re pretty easy to care for. Here are some essential tips:
- Water regularly: Keep the soil moist, especially during dry spells. Water deeply to encourage deep root growth.
- Fertilize occasionally: A balanced fertilizer can help your sunflowers grow strong and healthy. Apply fertilizer every few weeks, following the instructions on the label.
- Watch for pests: Sunflowers are generally pest-resistant, but keep an eye out for aphids, spider mites, and other pests. Treat any infestations promptly.
- Deadhead faded blooms: If you want to encourage more blooms, deadhead the faded flower heads by snipping them off just below the base.
Enjoying Your Sunflowers:
Soon enough, you’ll be rewarded with towering sunflowers that will brighten up your garden and fill your days with sunshine. Enjoy their beauty, their nectar-rich blooms attracting butterflies and hummingbirds, and their towering presence against the blue sky.
Growing sunflowers from seed indoors is a truly rewarding experience, especially for beginners. It’s a great way to connect with nature, bring a touch of sunshine to your home, and witness the wonder of life blooming before your very eyes. So go ahead, get those seeds started, and let your homestead journey blossom with joy!
Tips for Success:
- Be patient: Sunflower seeds can take anywhere from a few days to a week or more to germinate.
- Don’t overwater: Soggy soil can lead to root rot. Always check the moisture level before watering.
- Provide support: Tall sunflower varieties may need support as they grow. Use stakes or cages to help them stand tall.
- Have fun!: Gardening should be enjoyable. Experiment with different sunflower varieties and enjoy the process of watching your sunflowers grow.
Remember, everyone starts somewhere. Don’t be afraid to make mistakes, learn from them, and enjoy the journey. Happy gardening!
P.S. If you have any questions or want to share your sunflower growing experience, feel free to leave a comment below. I’d love to hear from you!


